An Exhaustive Guide to Signing and Notarizing on macOS
June 23, 2025
Recently I was building an Electron app and we hit a point where we wanted to release it to the world. Since I mostly do stuff with JavaScript, my day-to-day routine for this is usually pnpm build and git push. Oh how spoiled I am, for the world of desktop apps is far different.
The general overview of building a Mac app for distribution is seemingly straightforward: create a production build, “sign” it, then release it to the world. That is, if you can figure out how to sign it (P.S. there’s not just “signing” involved: you also have to “notarize” it!).
You must both code sign and notarize your app in order to not upset Gatekeeper, a security feature built into macOS which in short only allows apps that are code signed and notarized to be installed.
If you live in the Xcode world this is actually pretty straightforward. If you’re doing anything else, whether it be an Electron app or a standalone compiled executable (or even doing both!), it can get a bit confusing.
This is the guide I wished I had back when I was figuring out how to distribute on macOS, painfully put together after hours of compiling Apple documentation, scrutinizing random discussion threads, and talking in vain to LLMs. Whether it be a standalone .app, figuring how to deal with .dmgs, or a Mach-O executable (a fancy term for a compiled executable for Mac), I hope this guide will answer all of your questions.
If you’re lazy, feel free to chat with ChatGPT about this article instead and ask it all your specific questions.
Prerequisites
- A macOS machine
- Xcode and the Xcode Command Line Tools
- A paid Apple Developer account (must be enrolled in the Apple Developer Program)
- This is because a paid account is required to create a Developer ID Application certificate (which we’ll get into later)
For the purposes of this post, my project is a simple executable built from a Swift package. To get an executable for production, I run swift build -c release, and I get a built Mach-O executable at .build/release/my-binary. But this can be anything: a .app, a Mach-O compiled executable (Swift, Rust, Go, …), a .dylib, etc.
Signing
When you sign your executable/app/whatever, you’re asserting that the code is legit and it’s been verified as such by you. Therefore, if someone tampers with it after it’s been signed, the signature won’t be valid since it no longer matches what you originally approved.
You must have a Developer ID Application certificate in order to both sign and notarize your app for distribution. This can only be generated with a paid Apple Developer account.
You may already have this certificate installed on your machine — if so, no need to create a new one. To check, run the following:
security find-identity -vp codesigningThis command is used to find all the Apple certificate names installed on your current machine. If you see a certificate with “Developer ID Application” in the name, that means you have one and don’t need to create one. Otherwise, you need to create one.
Creating a Developer ID Application Certificate
- Open Xcode
- In the Xcode menu bar, click “Xcode” (next to the Apple logo)
- Click “Settings”
- Click “Apple Accounts” and select your Apple account
- Navigate to your team
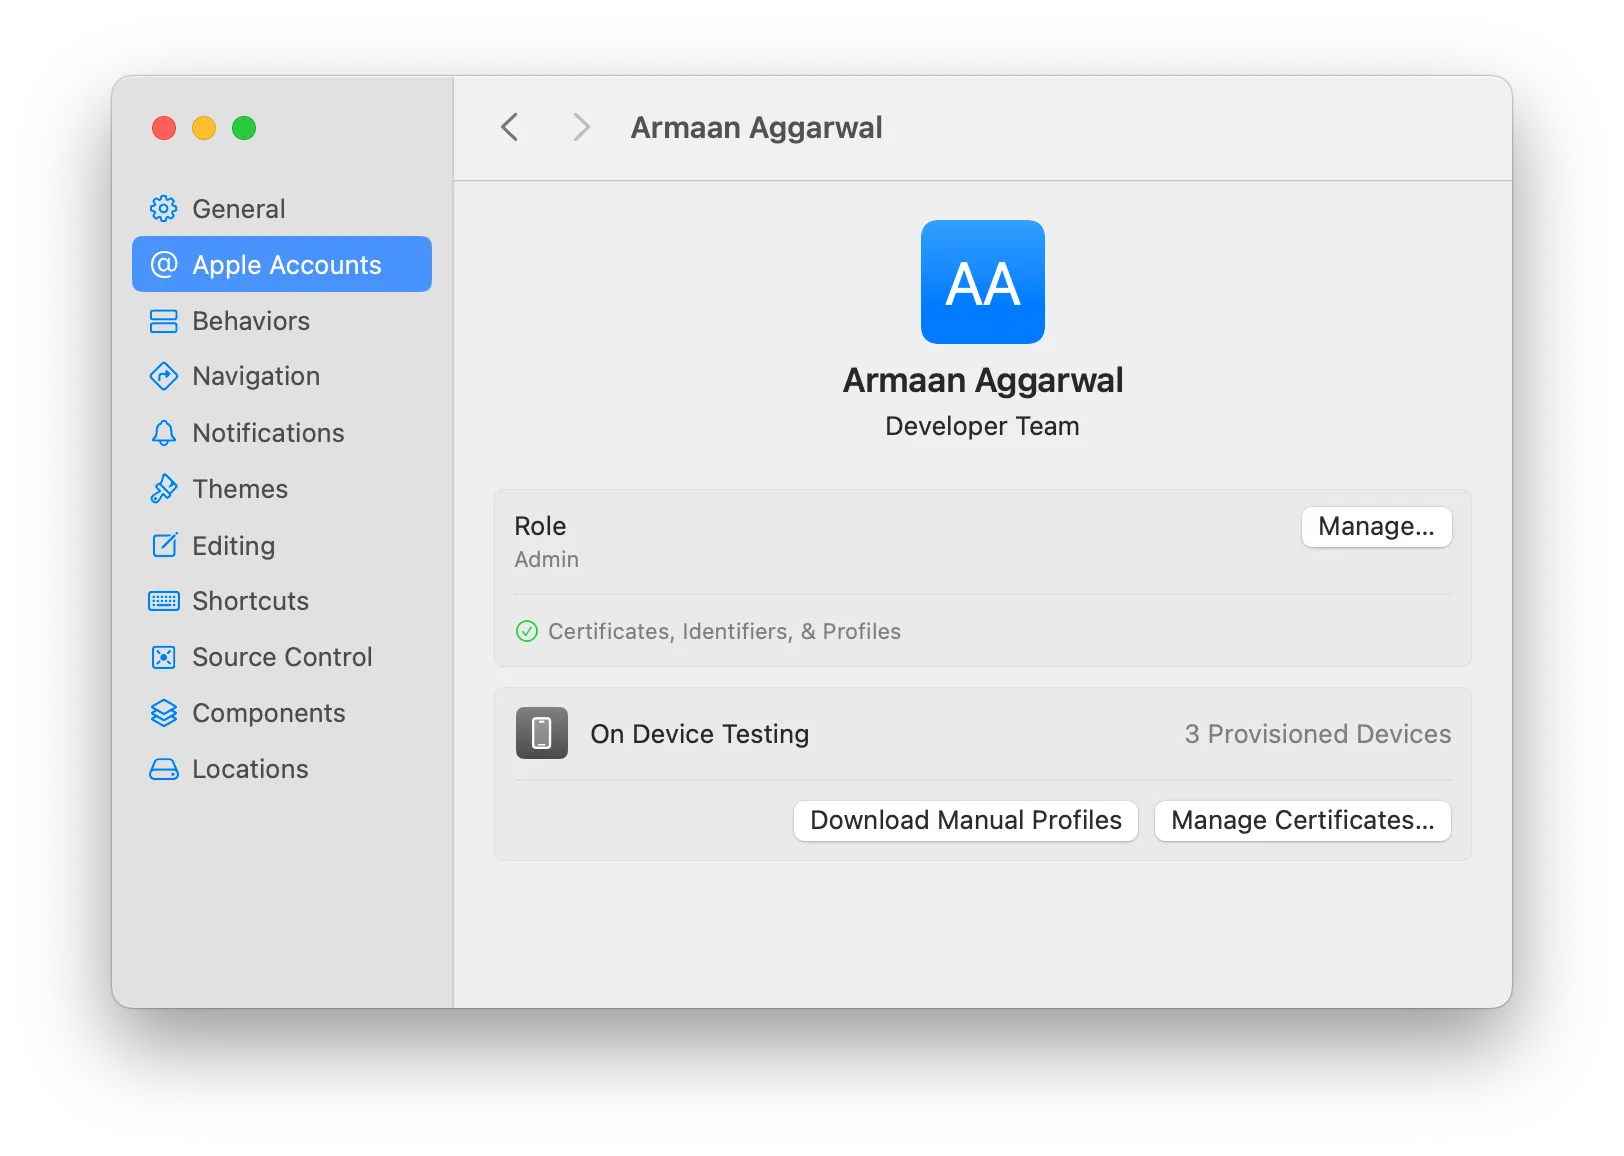
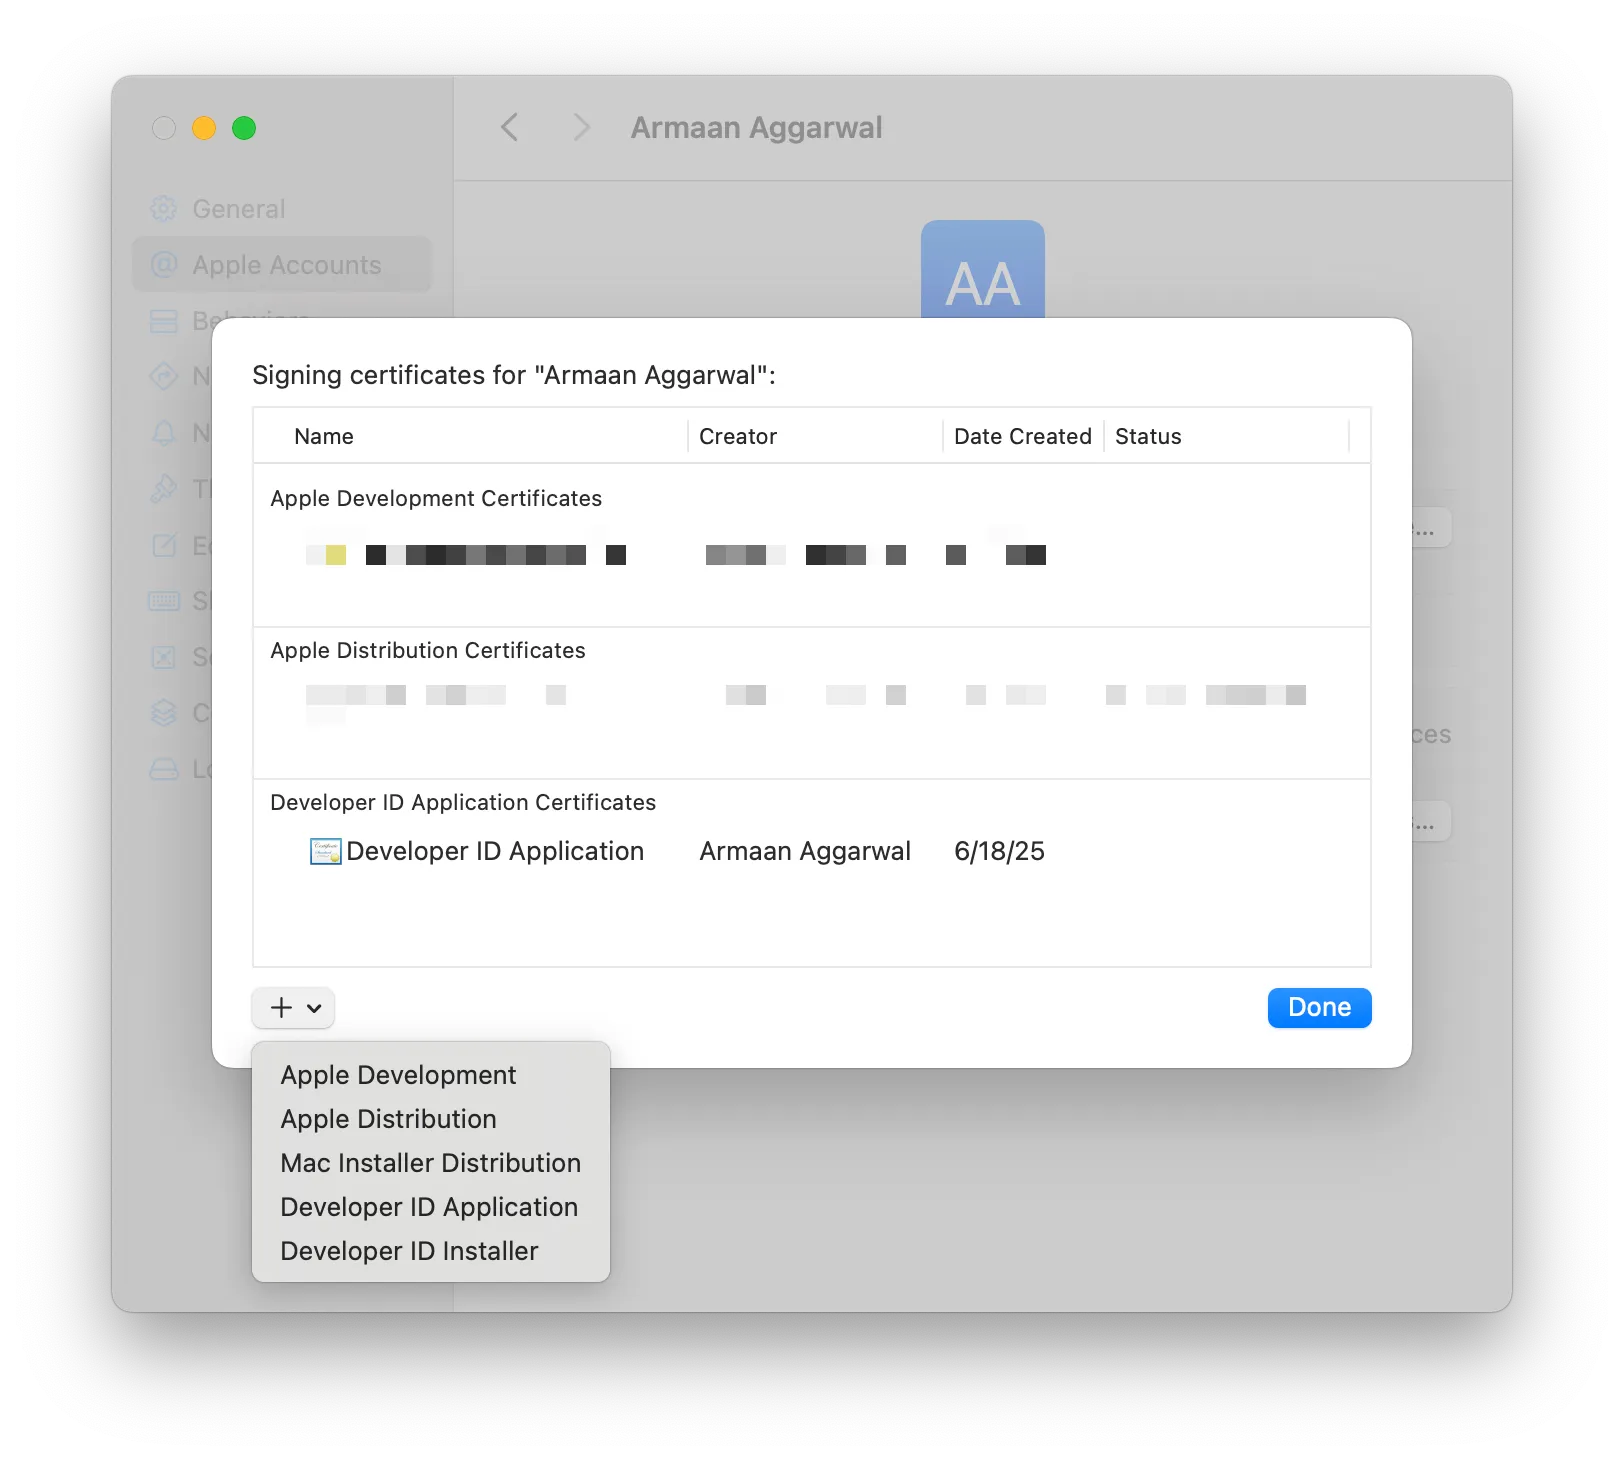
- Click “Manage Certificates”
- Click the ”+” icon in the bottom left corner
- Click “Developer ID Application”
Exporting the Developer ID Application (so non-account holders can use the certificate)
You only need to follow this step if you are not a root account holder and need the certificate on your machine. If you are a root account holder, skip this step.
These steps need to be followed by the root account holder. This also assumes they created the Developer ID Application certificate on their end (if not, follow the instructions above):
- Right-click the Developer ID Application certificate and click “Export Certificate”
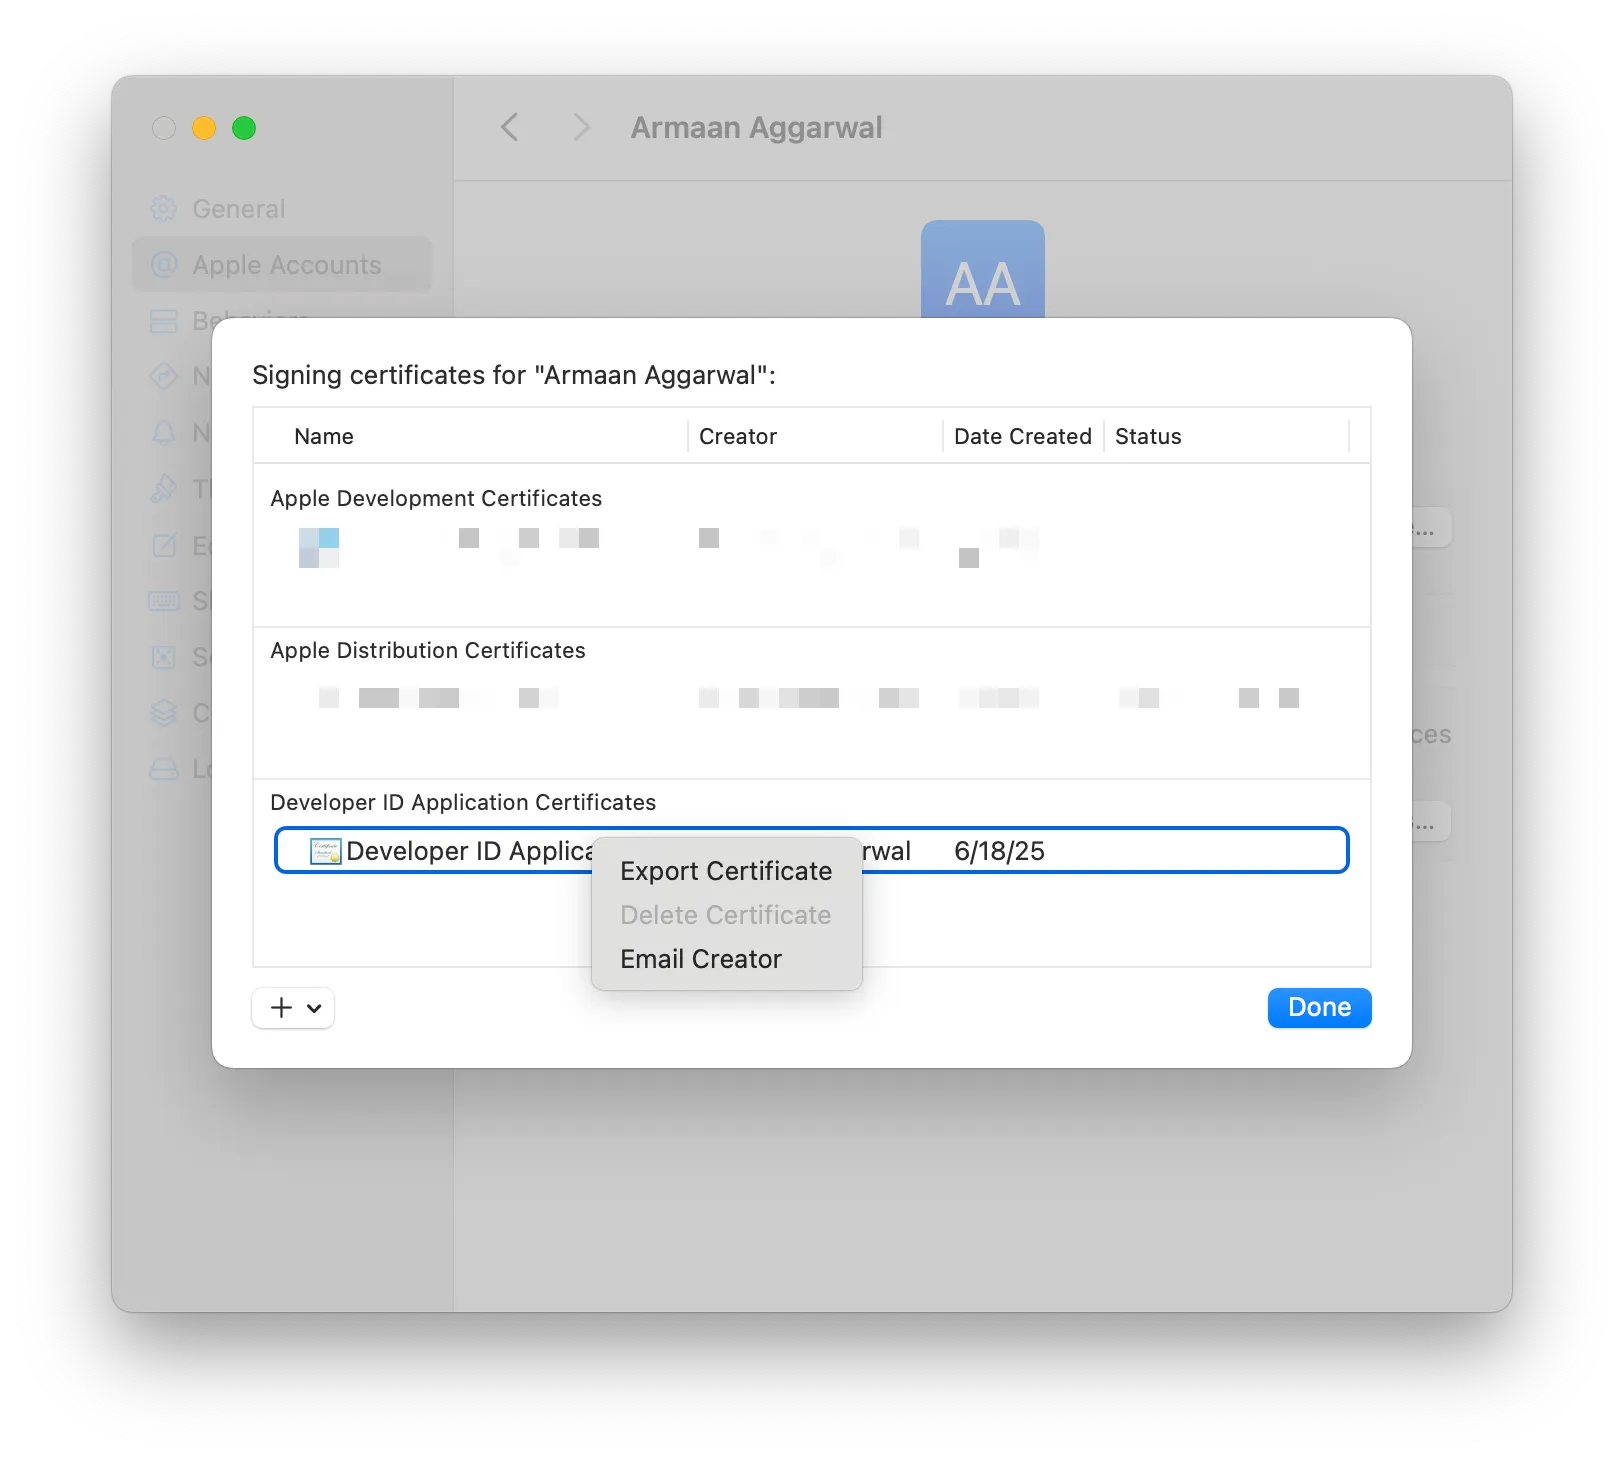
- This will export a .p12 file, which is the private key of the certificate. You will also be asked to give it a password, which you will need to give to your team members.
- Visit the “Certificates, Identities & Profiles” page in Apple Developer
- Click the certificate to view its details
- Click the “Download” button in the top right corner. This will export a .cer file, which is the public key of the certificate
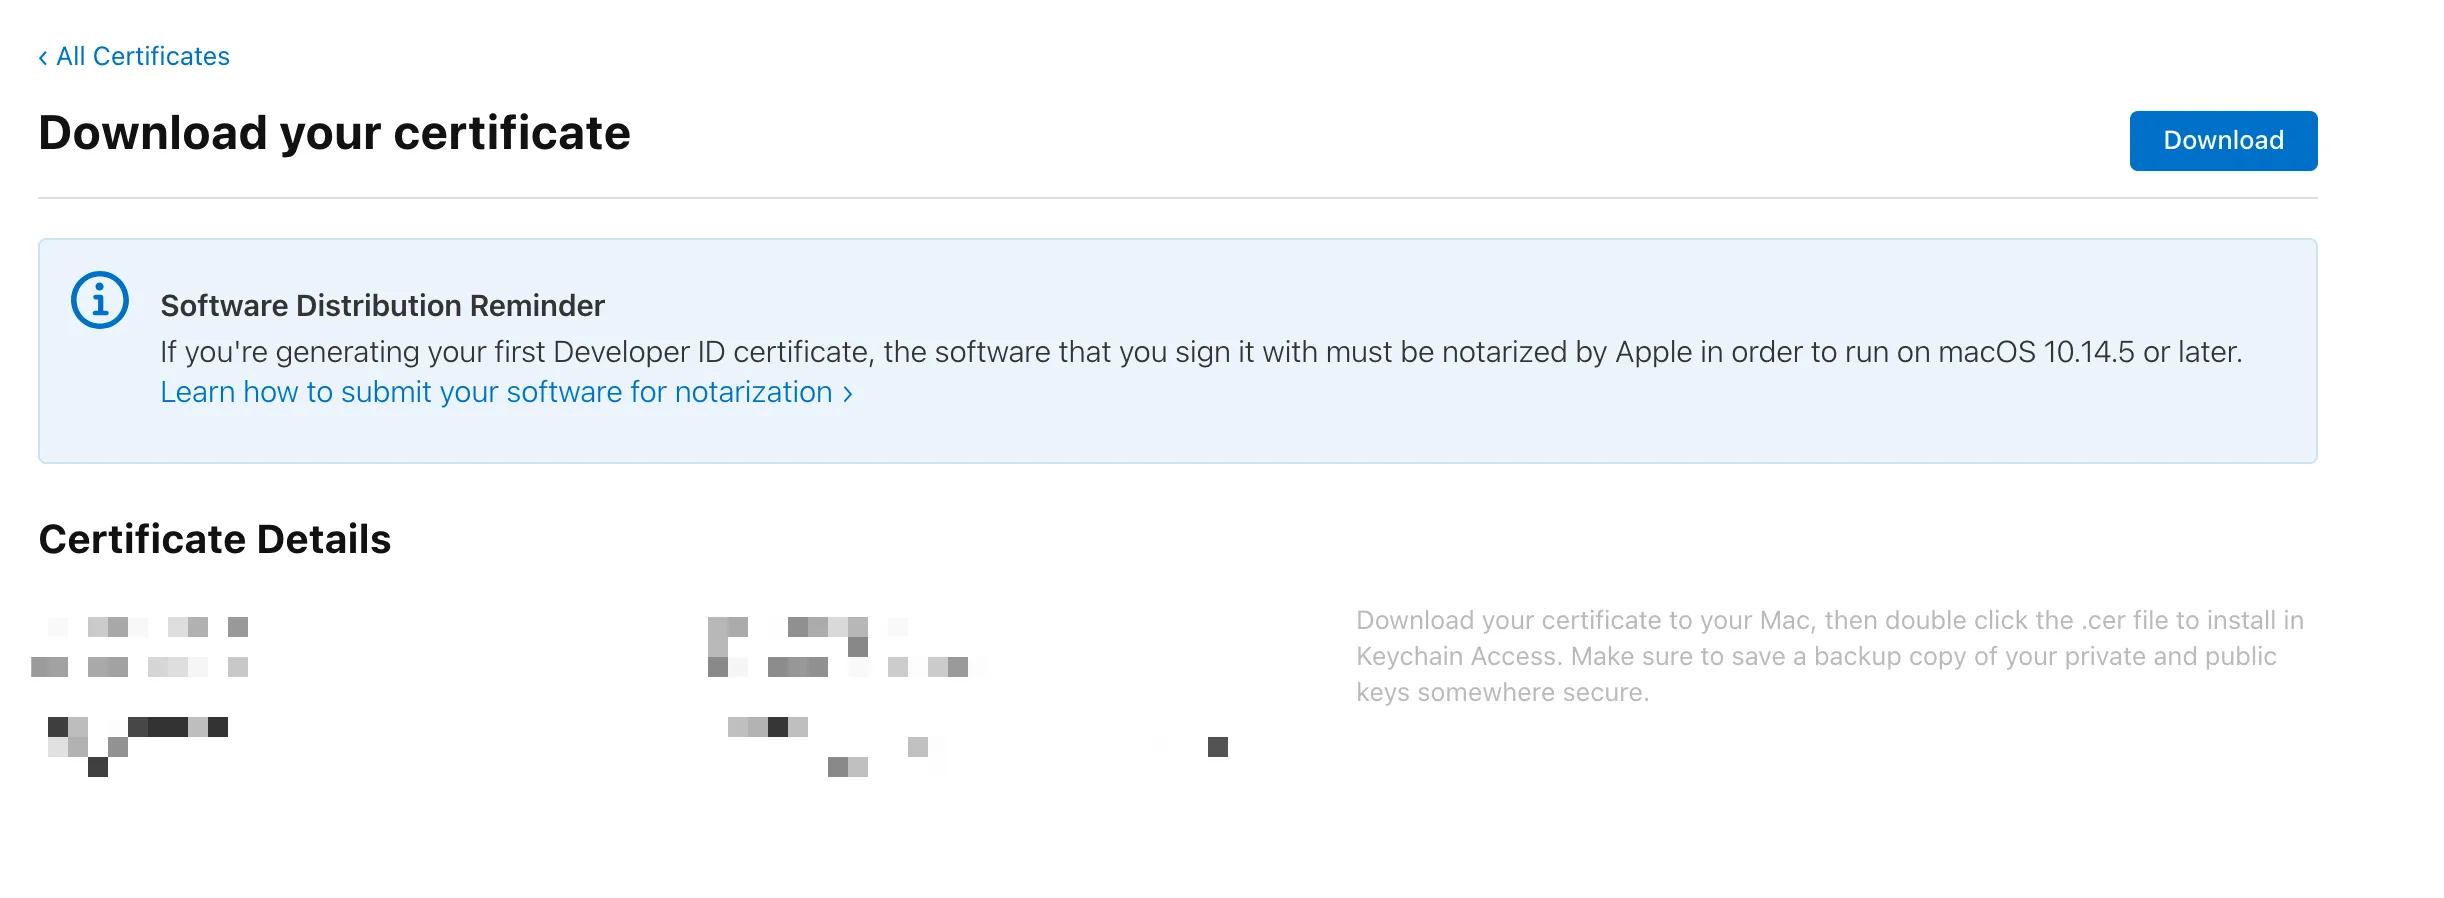
- Send the .cer (public key) and .p12 (private key) to your team member
- Ask your team member to double click both of the files to open them in Keychain Access, which will then install the certificate on their machine.
Verifying Our Certificate Is Installed
Now let’s rerun that command to view our code-signing certificates installed:
security find-identity -vp codesigningYou should see something similar to this:
1) ABCD1234567890FEDCBA0987654321ABCDE12345 "Developer ID Application: John Doe (ABCDEFGHIJ)" 1 valid identity foundProvided there is an entry with “Developer ID Application” in it, you’re good! You have the necessary certificate to code-sign Mac apps.
The string in quotes (Developer ID Application: John Doe (ABCDEFGHIJ)) is the identity name of the certificate. Copy it as we’ll need it.
Actually Signing Our App (or whatever it is you’re signing)
Run the following:
codesign \ --verbose \ --options runtime \ --timestamp \ --entitlements ./entitlements.plist \ --sign "Developer ID Application: John Doe (ABCDEFGHIJ)" \ ".build/release/my-binary"Walking through the arguments passed:
--verbose: This will log a message to confirm that the code signing was successful. It’s not actually that verbose :)--options runtime: To enable hardened runtime, which is required for notarization--timestamp: To include a secure timestamp for when the digital signature was created. Required for notarization.--entitlements ./entitlements.plist(optional): Remove this line if you aren’t using additional entitlements. Otherwise, provide the file path to your entitlements file here.--sign: We provide the identity name of our Developer ID Application certificate we extracted from before- The final argument is the path to our app/executable/whatever-that-we’re-signing.
Once you run this, your app will be signed! We can additionally verify that our app was signed like so:
codesign --verify --verbose ".build/release/my-binary"You should hopefully see something like this:
.build/release/my-binary: valid on disk.build/release/my-binary: satisfies its Designated RequirementAnd with that, we’ve finished signing our app! 🥳
Notarizing
Apple additionally requires us to notarize our app. In this step, we upload our binaries to Apple, which then checks it for malware. Don’t worry though, this isn’t App Review where we have to wait a day if we’re lucky — it’s a fully automated process, so it will take anywhere from a few seconds to a few minutes, depending on how large your app is.
According to Apple themselves:
Notarization completes for most software within 5 minutes, and for 98 percent of software within 15 minutes.
To upload to Apple’s notary service, we need to zip our app and upload the resultant archive. Zip your app like so:
ditto -c -k --sequesterRsrc --keepParent ".build/release/my-binary" "payload.zip"notarytool: Three Authentication Options, Which Path Do You Choose?
To notarize our app, we use a tool called notarytool. You have three options to choose from as to how to authenticate.
Option 1: Using an app-specific password
This by far is the most convenient, albeit the most insecure, method. You provide your Apple ID, your Apple Team ID, and an app-specific password.
An app-specific password is basically the equivalent of your normal password, in that it can be used to authenticate with your Apple ID, except it’s not your actual password. They cannot be scoped, so treat it like it gives access to your entire Apple account.
To create one, view Apple’s help page on app-specific passwords. To be able to notarize your Apple account’s role in the team must be either Developer, App Manager, Admin, or Account Holder.
Once you have created an app-specific password, you can notarize your app like so:
xcrun notarytool submit payload.zip \ --apple-id "johndoe@example.com" \ --team-id "ABCDEFGHIJ" \ --password "john-doe-likes-apples" \ --waitOption 2: Using an App Store Connect API Key
You can also authenticate with an App Store Connect API key. Apple has two types of API keys: team API keys and individual API keys.
Team API Keys
These can only be generated by team administrators (account holders and admins). Provided you have this access, you can go to App Store Connect’s Users and Access page to create a key.
When creating the key, ensure it’s role/access permission is either Developer, App Manager, or Admin.
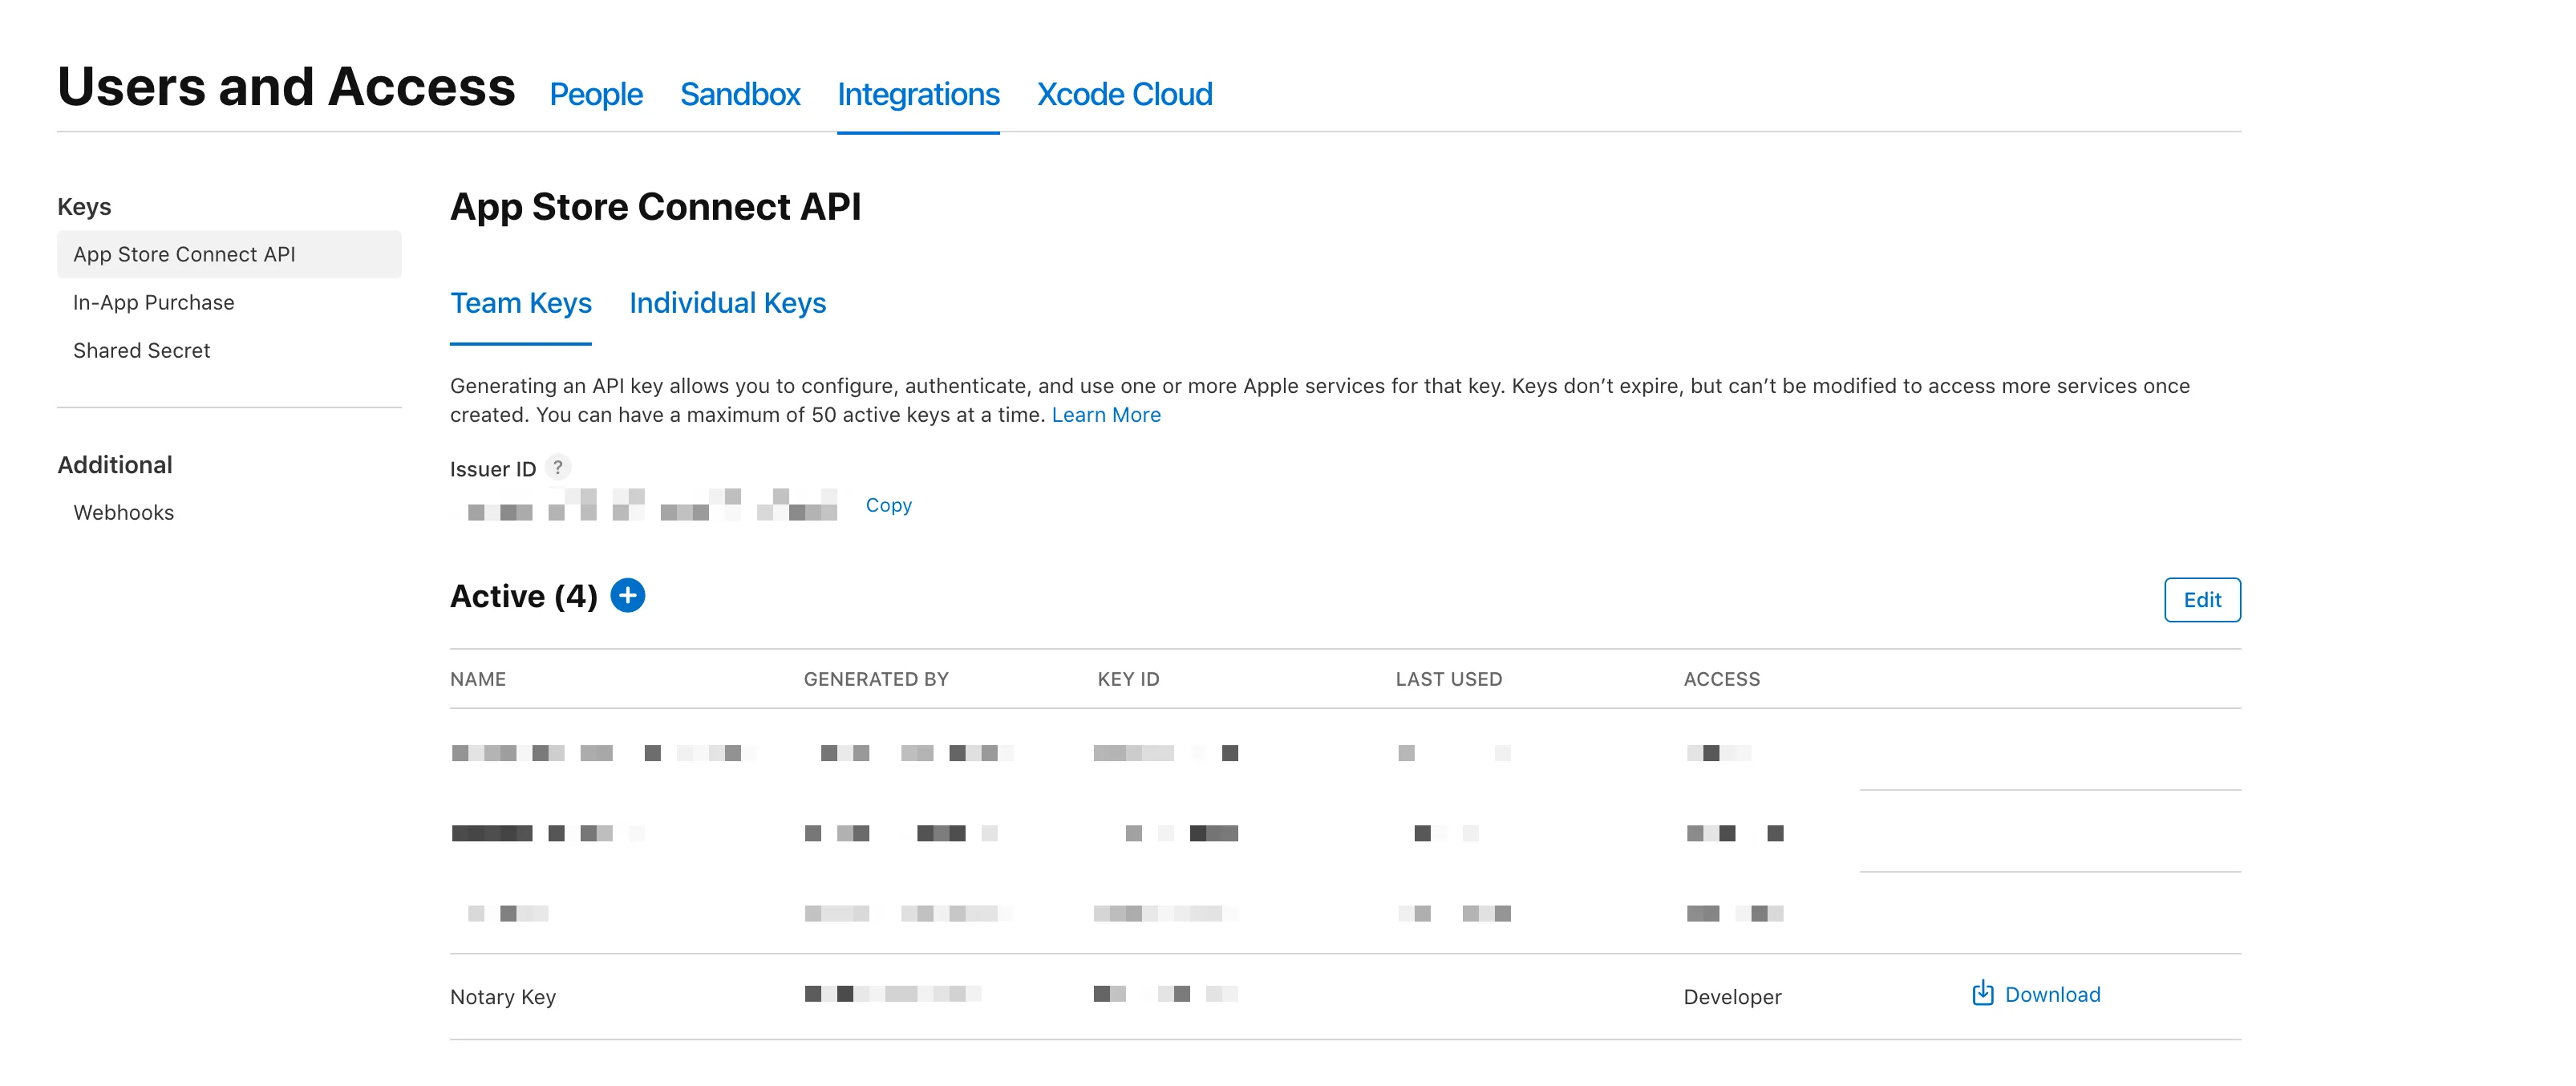
Copy the Issuer ID and the Key ID and download the key and store it at a specific path which you can reference.
Then call notarytool like so to notarize your app:
xcrun notarytool submit payload.zip \ --key "<path-to-downloaded-api-key>" \ --key-id "<key-id>" \ --issuer "<issuer-id-uuid>" \ --waitIndividual API Keys
You can also use an individual API key, which only has the permissions of the provided user granted by the team. One advantage with Individual API keys is that they don’t need to be created by an account holder nor an admin, but the user still must have permission to create Individual API keys.
To generate an individual API key:
- Go to App Store Connect
- In the top right corner, click your name
- Click “Edit Profile”
- Scroll down to “Individual API Key” and create a key
Once you create the key, you should see the Key ID and a link to download the API key. Copy the Key ID, and download the API key and save it to a path you can reference.

Then call notarytool like so to notarize your app:
xcrun notarytool submit payload.zip \ --key "<path-to-downloaded-api-key>" \ --key-id "<key-id>" \ --waitDo not provide an issuer ID for an individual API key. If you do, Apple will return a “401 Unauthorized” error.
Option 3: Storing Credentials in a Keychain
Instead of directly providing your credentials whenever you notarize, you can store them in a keychain, then reference them by the name of the keychain profile.
To do so, run:
xcrun notarytool store-credentialsIt will ask you for the credentials to store and to name your profile. As an added bonus, it even validates your credentials to make sure they’re valid!
Then to notarize your app:
xcrun notarytool submit payload.zip \ --keychain-profile "<name>" \ --waitBy default, it looks up the profile in the iCloud keychain. If you have a different path to read the keychain from, you can provide it with the --keychain argument, and then pass the path to a keychain file to use for reading the keychain item.
Post notarytool submit
The --wait option keeps notarytool running until notarization has either succeeded or failed.
If notarization fails, you can inspect the reason for why it failed like so:
- Search and copy the submission ID in the logs for when you ran
notarytool submit - Run the following:
And be sure to pass the arguments you used for authentication previously (xcrun notarytool log <submission-id>
--team-id,--apple-id,--password,--key,--key-id,--issuer,--keychain-profile, etc.)
Otherwise, notarization was successful! You can delete the zip file as this is only used for uploading to notarytool. Don’t worry though: the app at your original path will still be notarized.
You can verify your app was notarized successfully like so:
spctl --assess -vv --type install <path>Where <path> is the path to your app (not the zip file).
You made it! You both signed and notarized your app!
Stapling
Well, you almost made it. Just one final step.
When you notarize your app, Apple creates a ticket which Gatekeeper will use to verify that your app has been notarized when someone tries installing it. When you staple, you are attaching this ticket directly to your app, so Gatekeeper can directly use a local copy. Otherwise, if you do not staple the ticket, Gatekeeper will find the ticket online. You can easily avoid that extra network request for your users!
To staple the ticket to your app, run the following:
xcrun stapler staple -v <path>And that’s it, you’re completely done!
Distribution
If you’re shipping a .app for example, your users typically don’t download the .app directly. Instead they download a .dmg or .pkg.
.dmg and .zip: Do Not Sign Nor Notarize!
While it is possible to sign and notarize a .dmg and a .zip, you don’t need to, and it’s best not to. What matters is that the contents of the archive are signed and notarized.
See this Apple Developer Forum thread response from an official Apple Engineer for more information.
If you for whatever reason decide to sign and notarize these, the instructions are all the same.
.pkg: Must Be Signed and Notarized
To sign a .pkg, you must use a Developer ID Installer certificate (Installer, not Application).
You can create a Developer ID Installer certificate the same way as you do for creating a Developer ID Application certificate (just be sure to select “Developer ID Installer” and not “Developer ID Application”).
Then, to sign the .pkg, use the productsign CLI tool instead of codesign. Aside from that, I am unfortunately currently not very knowledgable about how to sign Mac Installer Packages.
Other Potential Things
”Do I Need To Sign and Notarize Bundled Code Items, Like Executables?”
Yes. Every bundled code item (executables, binaries, dylibs, etc) must be both signed and notarized independently and then bundled in your app. Your overall app must also be signed and notarized after.
To provide a more concrete example: let’s say you have an Electron app that bundles an executable built in, say, Rust. You would first sign and notarize that executable compiled by Rust. Then you would bundle that signed + notarized Rust executable in your Electron app. Finally, you would sign and notarize your built Electron app.
This is necessary because codesign and notarytool do not recursively sign nor notarize nested code items.
Also note: you would only need to sign and notarize binaries that aren’t already (ex: stuff you yourself are compiling). If you’re using frameworks or executables from other people, there’s a good chance it’s already signed and notarized.
Conclusion
To summarize: for distributing a code item on macOS, you must code sign for authenticity, notarize to validate it doesn’t contain malware, and staple the ticket.
Hopefully this saves you some trouble. My goal for this post was to have once nice little place for everything related to distributing on Mac. For many of these things, I had to do things like compare man pages from various different Xcode versions. I even ended up submitting a PR to Electron to fix a bug/add a supported feature for notarization, which I only discovered while writing this post. So yeah, I went through hell writing this post.
Now go get that bag!